ACURA TSX 2004-2008 Coilover Install Instructions

Welcome to the Acura TSX 2004-2008 coilover install instructions guide. This detailed walkthrough will provide step-by-step instructions to ensure a smooth and successful installation. We’ve included the recommended tools, precise torque specs straight from the manufacturer, and other essential tips to help you along the way. This guide focuses on the Function and Form Type 2 Coilover kit but will also work with our Type 3 and Type 4 coilover systems, designed to fit first-generation Acura TSX models from 2004 to 2008. For reference, our test vehicle was an Acura TSX modified with 215/50/17 tires. After installation, we recommend scheduling an alignment about a week later to allow time for the suspension to settle and achieve optimal performance. There is a link to a video at the bottom of this post if you would like to watch it instead.
The Acura TSX, introduced in 2004, was Honda’s answer to drivers seeking a blend of luxury, performance, and practicality in a mid-size sedan. Based on the European Honda Accord, the TSX stood out with its sporty handling, refined interior, and responsive engine. A hallmark of the TSX was its double-wishbone front suspension and multi-link rear suspension, which offered precise handling and excellent road feedback while maintaining ride comfort. This suspension setup made the TSX a favorite among enthusiasts and Acura TSX modified builds, as it provided a solid foundation for both spirited driving and aftermarket performance upgrades. The TSX remained a symbol of balanced engineering and continues to be appreciated for its blend of style, reliability, and dynamic driving capabilities.

TOOLS NEEDED
Sockets: 19mm, 17mm, 14mm, 12mm, 10mm.
Wrenches: 17mm.
Impact wrench.
Ratchet.
Torque wrench.
Rubber mallet.
Pry bar.
Spanner wrenches (provided with kit).
Measuring tape (provided with kit).
Floor jack.
Jack stands.
Flashlight (optional).

Before beginning the installation, measure the distance from the center of each wheel to the fender for both the front and rear.
Determine your desired ride height adjustment, then write down these measurements for reference.
Measurements before install:
Front: 15 1/4″
Rear: 14 7/8″
Goal:
Front: 14″
Rear: 14″

Safely lift the vehicle using the designated jack points.
Remove the wheels using a 19mm socket.

Unbolt the brake line bracket by removing the two bolts with a 10mm socket.
Remove the abs sensor by removing the two bolts with a 10mm socket.
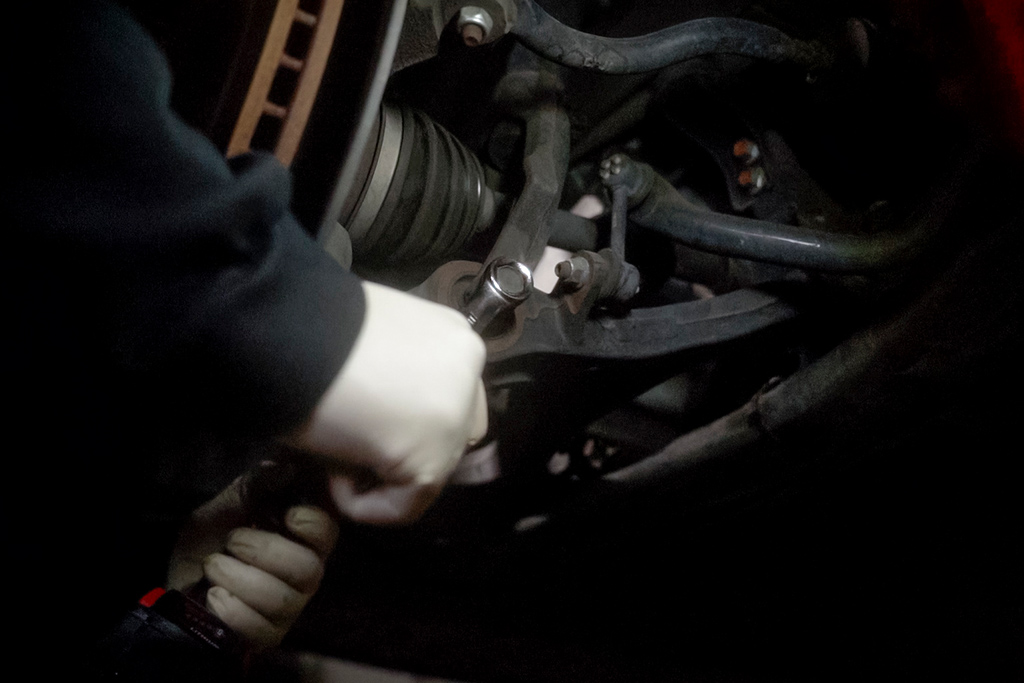
Loosen and remove the lower mount bolt with a 14mm socket to disconnect it from the fork.
Use a 17mm wrench and 17mm socket to detach the fork from the lower control arm, then tap it loose with a rubber mallet.
Remove the strut assembly (without the fork) by loosening the top hat nuts with a 12mm and 14mm socket.
Lift the spindle slightly to create enough clearance for strut removal.

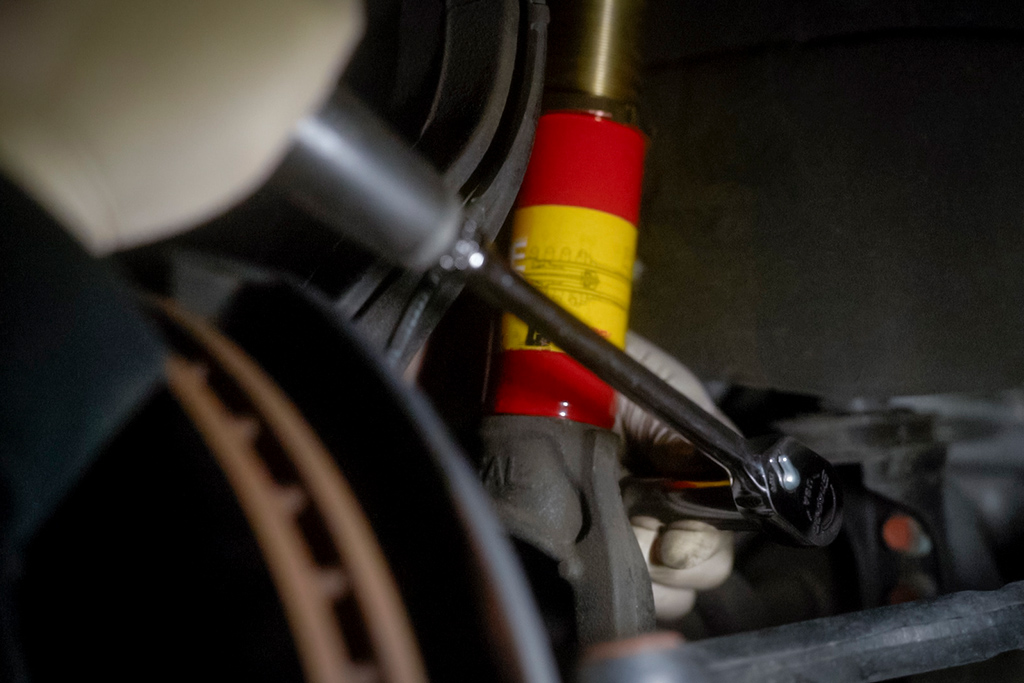
The OEM strut measured 18 ½ inches from the top hat to the fork mounting location.
To achieve a 1-inch drop, we adjusted the Type 2 coilover to 17 ½ inches.
ATTENTION: Do not adjust the height using the spring perches, as they are intended to adjust spring preload only.
Click here for video on how to reset preload.
Position the coilover in place and hand-tighten the top hat nuts.
Slide the coilover into the fork and secure it by hand-tightening the bolts.
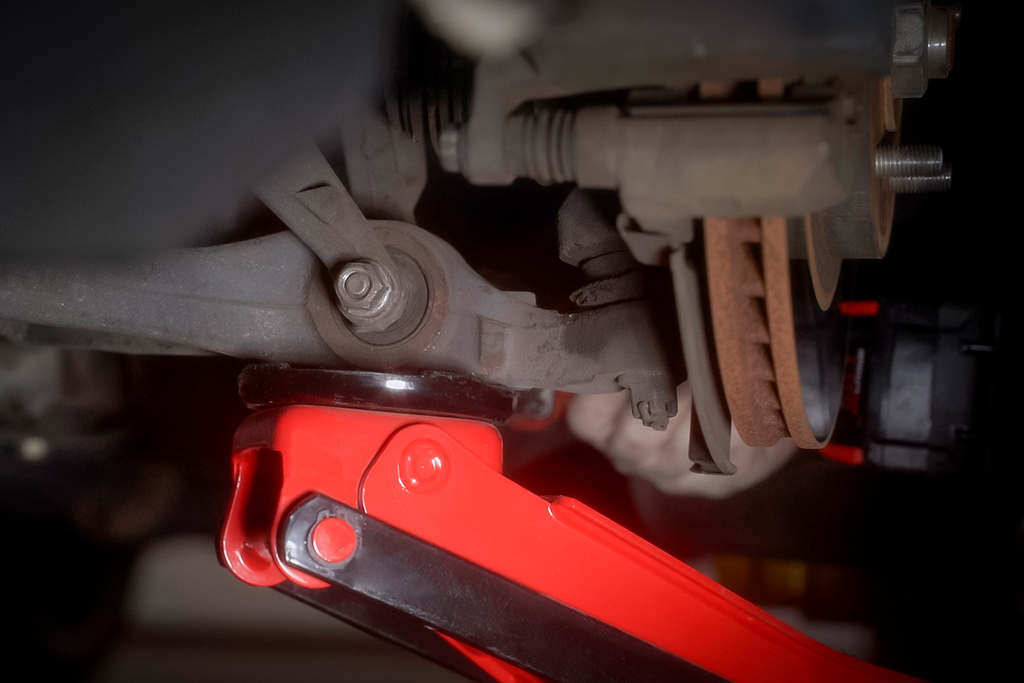
Use a jack to raise the spindle, then torque the lower control arm bolt to 47 lb-ft using a 17mm wrench and 17mm socket.
Secure the lower mount bolt to the fork with a 14mm socket and torque it to 32 lb-ft.
Reattach the brake line bracket and tighten the two 10mm bolts to 7.2 lb-ft.
Secure the ABS sensor by torquing the two 10mm bolts to 7.2 lb-ft.

Torque the top hat nuts in sequence: first the three 14mm nuts to 41 lb-ft, then the two 12mm nuts to 16 lb-ft.
Use the provided spanner wrenches to rotate the lower mount perch into the lower mount counterclockwise.
tap the spanner wrench with a rubber mallet to lock the perch in place.
Reinstall the wheels and torque the lug nuts to 80 lb-ft.
This concludes the front coilover installation for the Acura TSX.

REAR INSTALLATION
Open the rear doors and remove the single 10mm bolt located between the rear seat on the driver’s side.

Lift the bottom portion of the seat to unhinge it, then remove it completely.

Detach the seat side bolstering using a 10mm socket, then lift it upward to unlock it from its position—this provides access to the top hat nuts.

Move to the trunk and pull the yellow straps to fold the rear seats forward, creating more space to reach the top hat nuts.

Loosen the top hat nuts with a 14mm socket, but do not remove them yet.
Use a 19mm socket to remove the rear wheel.

To create clearance for strut removal, take off the top nut on the endlink using a 14mm socket, then use a pry bar to disengage it from its mounting position.
Next remove the strut assembly lower mount bolt with a 17mm socket.
Use a pry bar to free the strut from its lower mounting position.

Fully remove the strut by taking off the top hat nuts and maneuvering the top hat toward the fender for clearance.

The OEM strut measured 25 ½ inches from the top hat to the eyelet.
Adjust the coilover to the desired height—ours was set to 24 ½ inches.

Important: If adjusting the coilover to its highest setting, ensure at least 1 inch of thread engagement in the lower mount for secure fastening.

Position the coilover into place and hand-tighten the two top hat nuts.
Insert the lower mount bolt and torque it to 43 lb-ft.
Secure the endlink by torquing it down with a 14mm socket to 33 lb-ft.
Torque the two top hat nuts to 37 lb-ft using a 14mm socket.

Adjust the dampening to suit the driver’s preference—we set ours to 12 clicks in the front and 10 in the rear.
Tip: For a comfortable ride, set the front dampening higher than the rear. A stiffer rear setting may result in a bumpier ride.
Reinstall the rear seats.
Mount the wheels and torque the lug nuts to 80 lb-ft.
This completes the TSX coilover installation. We recommend performing an alignment one week after installation to allow the suspension to settle properly.

Learn about us here
Follow us on Instagram